React에서의 Props, State, useState, 이벤트 등을 그대로 사용한다.
클래스형 컴포넌트에서 어떻게 사용해야하고, 동작하는지는 React강의를 들으며 정리한 자료에 나와있다.
JAX, 컴포넌트 생성, Props
https://joylee-developer.tistory.com/106
생활코딩 React 강의 (3) - 컴포넌트, 다른 파일로 컴포넌트 분리하기
리액트가 없다면 코드를 그대로 다 html문서에 작성해야 한다. 코드가 많아질수록 한 눈에 구조를 보기 힘들다. 이럴 때 리액트를 사용하면 컴포넌트의 이름으로 간단하게 html 문서를 구성할 수
joylee-developer.tistory.com
함수형 컴포넌트를 사용한 적이 있지만, 글로 정리한 것이 없어서 여기에서는 짧게 정리하려고 한다.
JAX
React Native 에서 사용하는 언어이다. Javascript와 비슷하면서 다르다.
주의사항
- 하나의 부모로 감싸진 형태로 return 해야한다.
(<Fragment></Fragment>("react"에서 import해야함) 혹은 <></>로 감싸도 된다.) - javascript 변수는 {중괄호}로 감싸서 사용해야 한다.
- 조건문에 따라 다른 내용을 렌더링할 수 있다.(if, and, or, 삼항연산자)
코드가 복잡해지면 JAX코드 외부에서 조건문을 처리하고, {변수} 로 전달하는 것이 좋다. - return null은 에러가 발생하지 않지만 return undefined 는 에러가 발생하므로 주의해야 한다.
- 주석 {/* */}
- 스타일 적용방법 (cammelCase로 작성해야한다)
1. 태그에 직접 스타일 적용
2. stylesheet를 만들어 적용
|
1
2
3
4
5
6
7
8
9
10
11
12
13
14
15
16
17
18
19
20
21
22
23 |
import { StyleSheet, View, Text, TextInput } from "react-native";
export default function App() {
return (
{/* stylesheet 적용 */}
<View style={styles.container}>
{/* 직접 style 적용 */}
<TextInput style={{borderWidth: 1, padding: 10, fontSize: 20}}
/>
</View>
);
}
// styleSheet const styles = StyleSheet.create({
container: {
flex: 1,
backgroundColor: "#fff",
alignItems: "center",
justifyContent: "center",
},
});
|
cs |
내장 컴포넌트
https://reactnative.dev/docs/components-and-apis
Core Components and APIs · React Native
React Native provides a number of built-in Core Components ready for you to use in your app. You can find them all in the left sidebar (or menu above, if you are on a narrow screen). If you're not sure where to get started, take a look at the following cat
reactnative.dev
공식 홈페이지에 가보면 다양한 내장 컴포넌트에 대해 자세한 설명을 볼 수 있다.
사용할 컴포넌트를 import해야 사용할 수 있다.
커스텀 컴포넌트
기본적인 구조는 아래와 같다.
import React from "react";
import { 사용할 내장 컴포넌트 } from "react-native";

const MyComponent () => {
	return (
    	{/* JAX로 작성된 코드 */}
    )
}

export default MyComponent
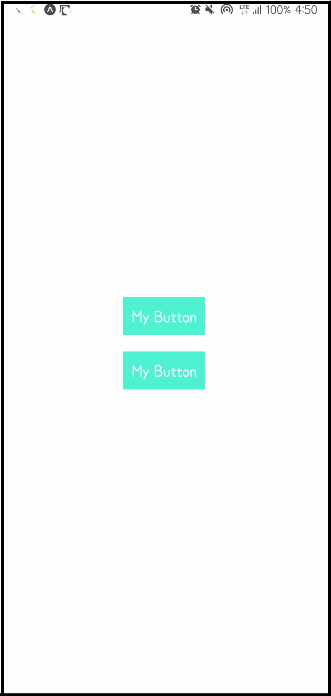
직접 MyButton 이라는 컴포넌트를 만들어본다.
|
1
2
3
4
5
6
7
8
9
10
11
12
13
14
15
16
17
18
19
|
// Mybutton.js
import React from "react";
// 사용할 내장 컴포넌트를 import 한다
import { TouchableOpacity, View, Text } from "react-native";
// MyButton이라는 커스텀 컴포넌트를 만든다
const MyButton = () => {
return (
<TouchableOpacity onPress={() => console.log("MyButton")}>
<View style={{ backgroundColor: "turquoise", padding: 10, margin: 10 }}>
<Text style={{ fontSize: 20, color: "white" }}>My Button</Text>
</View>
</TouchableOpacity>
);
};
export default MyButton;
|
cs |
사용할 곳에서 import해서 사용하면 내장 컴포넌트처럼 사용할 수 있다.
|
1
2
3
4
5
6
7
8
9
10
11
12
|
// App.js
// ...
import MyButton from "./MyButton";
export default function App() {
return (
<View>
<Mybutton />
<Mybutton />
</View>
);
};
|
cs |

'React Native' 카테고리의 다른 글
| React Native - 이벤트 (0) | 2021.12.03 |
|---|---|
| React Native - State (0) | 2021.12.03 |
| React Native - Props, Children (0) | 2021.12.03 |
| React Native - Expo 프로젝트 만들기 (0) | 2021.12.02 |
| React Native 란? (0) | 2021.12.01 |